
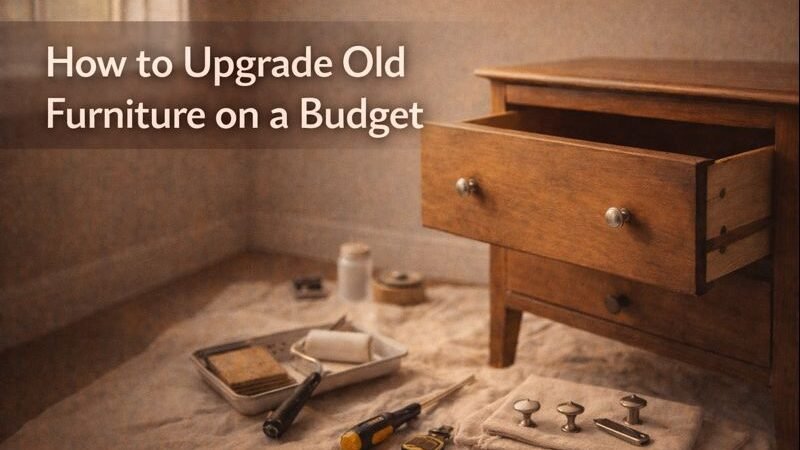
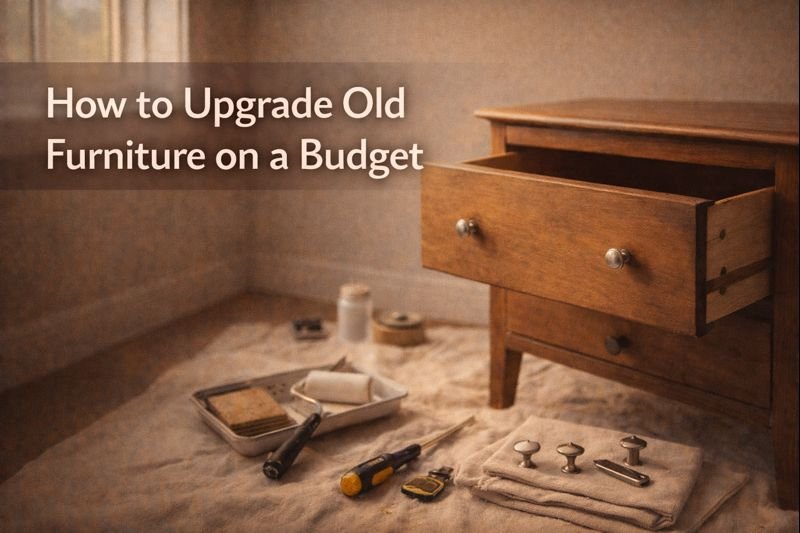
I opened the old drawer and smelled dust.
The handle felt cold, slightly loose.
I still wanted to save it.
Quick Promise / What You’ll Learn
I shared the exact low-cost way I upgraded tired furniture.
I kept it practical, calm, and repeatable on a small budget.
Table of Contents
- Introduction
- Key Takeaways
- Main Body
- Background / Definitions
- The Core Framework / Steps
- Examples / Use Cases
- Best Practices
- Pitfalls & Troubleshooting
- Tools / Resources (optional)
- FAQs (Q1–Q10)
- Background / Definitions
- Conclusion
- Call to Action (CTA)
- References / Sources (if needed)
- Author Bio (1–3 lines)
Introduction
Problem/context
I lived with furniture that looked tired. The surfaces showed scratches and dull patches. Some pieces wobbled when I leaned on them. The room felt slightly unfinished, even when it stayed clean.
I also lived with a tight budget. I did not want to replace everything. I wanted to keep what still worked. I wanted the space to feel intentional, for once.
Why it mattered now
I noticed how quickly the home mood shifted. A single worn tabletop made the room feel neglected. A sagging chair cushion made me sit differently. Those small signals drained comfort, in a quiet way.
I also noticed how expensive “new” became. Delivery fees piled on, and low quality showed fast. I felt like I paid twice, which felt rough. I chose the slower route instead, and it stayed worth it.
Who this was for
This guide fit renters and homeowners. It fit anyone who wanted results without drama. It fit people who liked hands-on work, even if they felt nervous. It fit anyone who wanted to keep stories, while upgrading the look.
Key Takeaways
- I started with cleaning and small repairs first.
- I focused on touch points like handles and edges.
- I chose paint, stain, or oil based on surface type.
- I upgraded hardware before buying anything big.
- I used thin coats and patient drying time.
- I protected the floors and corners with simple padding.
- I finished with a seal that matched real use.
Main Body
Background / Definitions
Key terms
I treated “upgrade” as improved function and appearance. I did not chase perfection. I aimed for sturdy joints, smooth touch, and clean lines. That definition kept me calm, on the hard days.
I treated “budget” as controlled spending and controlled waste. I reused what I already had. I bought only what removed a bottleneck. I also accepted a little imperfection, and it looked human.
I treated “old furniture” as any piece with a good frame. Age did not matter as much as structure. Solid wood, stable legs, and strong joints counted. That focus saved me money, in a simple way.
Common misconceptions
I once believed paint solved everything. Paint hid issues for a week, then chips showed. Loose joints stayed loose under paint. I learned that prep mattered more than color, in real life.
I also believed sanding had to be intense. I attacked one piece too aggressively. The surface looked uneven, and I felt annoyed. I later sanded lightly and consistently, and it went better.
I believed cheap upgrades looked cheap by default. That idea faded after one hardware swap. A new knob changed the whole face of a dresser. Small changes carried surprising power, on a budget.
The Core Framework / Steps
Step 1
I started with a slow inspection. I pressed on corners and listened for creaks. I opened drawers and watched for rub marks. I wrote down what felt wrong, on a plain note.
I then cleaned everything deeply. I used warm water and mild soap first. I wiped again with a degreaser where my hands touched most. The piece felt different already, in a small relief.
I fixed the basic structure next. I tightened the screws and replaced the missing ones. I glued loose joints and clamped them overnight. The wobble stopped, and the piece felt trustworthy again.
Step 2
I chose a finish based on what the furniture needed. I used paint when the surface looked uneven or mixed. I used stain or oil when wood grain looked worth keeping. I used a clear coat when the piece already looked decent.
I prepped the surface with light sanding. I aimed for a dull, even texture. I wiped the dust with a damp cloth and let it dry. That quiet step saved me from gritty finishes later.
I handled dents and chips with filler when needed. I pressed it in and smoothed it flat. I waited until it dried completely. I sanded it flush, and the repair disappeared.
Step 3
I applied the finish in thin layers. I used a small roller for flat areas and a brush for corners. I kept strokes consistent, in one direction. I stopped before I overworked it, which helped.
I let each coat dry longer than I wanted. I rushed once and regretted it. The surface stayed tacky and picked up dust. Patience made the finish look expensive, even when it was not.
I sealed high-use surfaces. I sealed tabletops and dresser tops especially. I chose a durable topcoat and kept it thin. The piece then handled real life better, which mattered most.
Optional: decision tree / checklist
I followed a simple decision tree. I checked the structure first, then surface, then style. I chose paint for messy surfaces and stain for good grain. I upgraded hardware last, like a final sentence.
Examples / Use Cases
Example A
I upgraded a small side table with scratches. I cleaned it and sanded it lightly. I painted it a soft neutral in two thin coats. I sealed the top, and it looked calm.
I changed the foot pads too. The table stopped scraping the floor. The room felt quieter at night. That tiny win felt oddly satisfying, to be honest.
Example B
I upgraded an old dresser that looked dull. I removed all the knobs and labeled them in a bag. I tightened drawer tracks and fixed a loose side panel. The drawers then slid better, which felt like progress.
I painted the body and left the top stained. I liked the contrast and warmth. I added new handles with a simple, clean shape. The dresser looked like a considered piece, not a leftover.
Example C
I upgraded a dining chair set with sagging seats. I removed the seat bases carefully and kept the screws. I tightened joints and added glue where wood met wood. The chairs stopped shifting under weight, which felt safer.
I replaced the foam and wrapped it with batting. I stapled new fabric tightly, pulling evenly. I trimmed the underside and added a dust cover. The chairs looked fresh, and the comfort returned fully.
Best Practices
Do’s
I did start with the parts I touched most. I upgraded the handles, edges, and seat comfort first. Those areas changed the daily experience the fastest. That focus kept me motivated, on slow weekends.
I did measure twice before drilling. I marked holes with tape and a pencil. I used a simple template for handling alignment. The hardware then looked straight, which mattered more than fancy.
I did protect the workspace. I laid down a drop cloth and opened the windows. I wore gloves when needed and kept rags nearby. A clean setup reduced stress and mistakes, in my case.
Don’ts
I did not skip cleaning. Grease and dust ruined paint adhesion. The finish later peeled, and it felt discouraging. I learned that cleaning stayed the real beginning, not sanding.
I did not over-sand the edges. Rounded corners looked amateur fast. I kept the edges crisp with light pressure. That restraint made the piece look more professional, even on a budget.
I did not buy supplies all at once. I bought only what the project required. Extra products sat unused and wasted money. I kept the list short and honest, most times.
Pro tips
I used cheap upgrades with big visual impact. New knobs and pulls changed a piece instantly. Peel-and-stick liner inside drawers added a clean feel. Felt pads under legs prevented noise, and it felt kinder.
I used color strategically. I painted dark on pieces that took abuse. I used lighter tones where I wanted calm. I kept the finish consistent across a room, and it looked cohesive.
I took breaks between steps. I stepped away after sanding and after the first coat. I returned with fresh eyes and steadier hands. That pause improved results more than any tool, strangely enough.
Pitfalls & Troubleshooting
Common mistakes
I painted over glossy surfaces once. The paint slid and streaked. It later chipped at corners. I felt embarrassed, then I sanded it back and started again.
I rushed drying time too often in early projects. I stacked items too soon. The finish stuck and tore. I learned that “dry to touch” did not mean cured, in practice.
I ignored small structural issues sometimes. A loose joint ruined the whole experience. The piece still felt cheap, even after paint. I learned to fix the bones before the skin.
Fixes / workarounds
I fixed peeling paint by sanding back to stable edges. I feathered the boundary gently. I cleaned the dust well. I repainted thinly and sealed it, and it held better.
I fixed sticky drawers with wax and minor track adjustment. I checked for swollen wood from moisture. I sanded the rub points lightly. The drawers then moved without forcing, which felt like relief.
I fixed uneven finishes by adding one more thin coat. I avoided heavy layers that pooled. I kept the brush clean and strokes consistent. The surface then looked calmer, not busy.
Tools / Resources
Recommended tools
I relied on a small set of basics. I used sandpaper in a few grits, a sanding block, and a tack cloth. I used a decent brush and a small roller. Those tools covered most projects, without clutter.
I used wood glue and clamps for stability. I used filler for chips and dents. I used a screwdriver set and a tape measure. I kept it simple, and the work stayed manageable.
I used safety basics too. I wore a mask when sanding. I ventilated well during finishing. I protected floors with cardboard, and it saved cleanup time.
Templates / downloads
I used a paper template to handle holes. I measured it once and reused it across drawers. The spacing stayed consistent. That repeatable method looked more professional, on a low budget.
I used a small budget worksheet in my notes. I listed supplies, estimated costs, and wrote what I already owned. I set a cap before shopping. That cap kept the project honest, at the moment.
I used a “finish plan” note. I wrote prep steps, coat count, and drying time. I checked off each stage slowly. That tiny structure reduced mistakes, especially at night.
FAQs
Q1–Q10
Q1 covered how I chose which piece deserved time. I chose pieces with solid frames and stable joints. I avoided swollen particle boards and broken frames. I invested effort where it returned value, for sure.
Q2 covered how I picked between paint and stain. I painted when surfaces looked patchy or mismatched. I stained when wood grain looked attractive. I sealed both when the piece faced heavy use.
Q3 covered how I kept costs low. I reused tools across projects. I bought multipurpose supplies, not specialty ones. I focused on hardware and prep, which gave big change for little money.
Q4 covered how I handled odors and ventilation. I opened windows and used fans for airflow. I worked in smaller sessions. I stored rags safely, and the room stayed more comfortable.
Q5 covered how I avoided brush marks. I used thin coats and avoided overworking wet paint. I kept a wet edge and moved steadily. I sanded lightly between coats when needed.
Q6 covered how I upgraded upholstery cheaply. I replaced foam only when it collapsed. I reused seat boards and screws. I chose durable fabric and pulled it tight, which mattered.
Q7 covered how I improved drawers and doors. I tightened hinges and aligned tracks. I added wax to rub points. I replaced cheap plastic glides when they cracked, and it felt smoother.
Q8 covered how I prevented future damage. I sealed tops and corners that took abuse. I used felt pads and coasters. I kept harsh cleaners away from finishes, and it preserved the look.
Q9 covered how I created a cohesive look. I repeated one metal finish across the handles. I repeated one paint tone across two pieces. I kept the room palette calm, and it looked intentional.
Q10 covered how I decided a project was “done.” I checked stability, touch, and function. I checked that drawers opened cleanly. I stopped chasing tiny flaws, and the piece felt complete.
Conclusion
Summary
I upgraded old furniture by fixing the structure first. I cleaned well, prepped lightly, and finished in thin layers. I focused on touch points like handles and drawers. The results looked better than the money suggested, in my home.
Final recommendation / next step
I chose one small piece and finished it fully. I kept the supplies minimal and the steps clear. I allowed drying time without rushing. That single win built confidence for bigger upgrades later.
Call to Action
Pick one piece you already owned and liked. Clean it deeply and tighten everything first. Choose one finish and one hardware upgrade, then commit to thin coats. Share a before-and-after photo with a friend, and enjoy the quiet pride.
References / Sources
No citations and no links appeared here, as requested. This section stayed minimal on purpose. The guidance stayed practical and experience-driven.
Author Bio
Sam wrote calm, practical home guides with a lived-in tone. He liked budget fixes that felt real and repeatable. He believed small upgrades changed daily comfort the most.