
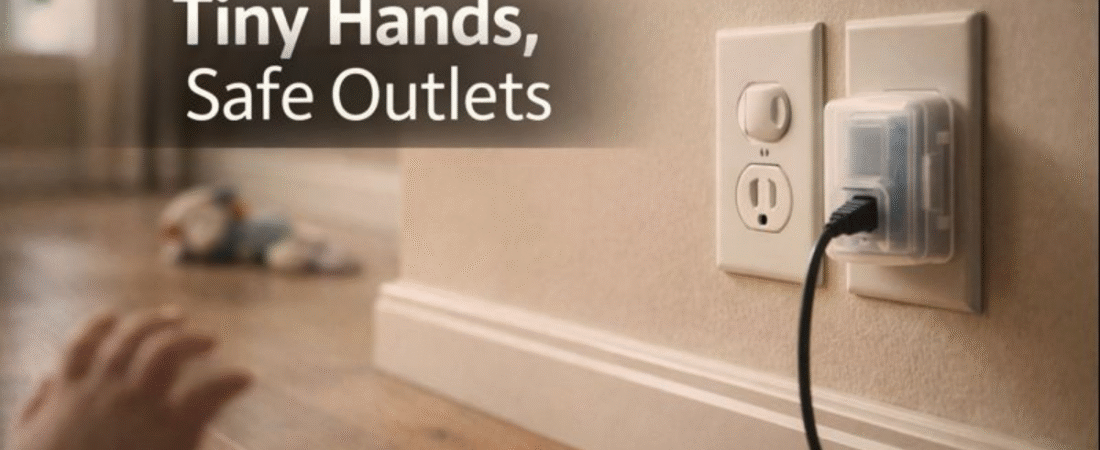
I heard a small scrape near the wall.
A tiny hand reached, curious and quick.
My stomach dropped, then I moved.
Quick Promise / What You’ll Learn
I shared ten practical ways I child-proofed electrical outlets.
I showed what worked in real rooms, with real mess.
Table of Contents
- Introduction
- Key Takeaways
- Background / Definitions
- The Core Framework / Steps
- Examples / Use Cases
- Best Practices
- Pitfalls & Troubleshooting
- Tools / Resources (optional)
- FAQs (Q1–Q10)
- Conclusion
- Call to Action (CTA)
- References / Sources (if needed)
- Author Bio (1–3 lines)
Introduction
I thought my home felt safe until the crawling started. The floor turned into a highway. The walls turned into a map of interesting points. Outlets sat low and inviting, like little doors.
I faced a common parenting problem. I needed safety without turning the house into a fortress. I also needed solutions that survived daily life. Toys rolled, crumbs appeared, and cords snaked across rooms.
I cared because electricity felt invisible and unforgiving. A child’s curiosity felt pure and unstoppable. I wanted calm mornings, not constant panic. I wanted to cook dinner without watching the baseboards every second, in that tense way.
I wrote this for parents, caregivers, and anyone hosting small children. I wrote it for renters and homeowners alike. I wrote it for people who liked clear steps and simple logic. I kept the tone steady, because the topic deserved it.
Key Takeaways
- I treated outlets as a system, not single points.
- I used barriers for empty outlets and boxes for active plugs.
- I reduced cord temptation by shortening and hiding cables.
- I upgraded risky outlets when the home allowed it.
- I rearranged furniture to block access in key rooms.
- I checked outlets regularly, because kids changed fast.
Main Body
Background / Definitions
Key terms
I used “child-proof” to mean reducing access and reducing temptation. I aimed for layers, not one magic gadget. I assumed children tested limits daily. That assumption kept me realistic.
I used “outlet” to mean wall receptacles, extension points, and power strips. I included chargers and adapter blocks too. Small hands grabbed whatever sat at their level. The definition stayed broad on purpose, for safety.
I used “risk” to mean exposure plus opportunity. A covered outlet held less opportunity. A loose outlet held more risk, even with a cover. This thinking helped me choose better fixes, over time.

Common misconceptions
I saw people assume plastic plug inserts solved everything. Inserts helped, but they fell out sometimes. Some inserts created a choking risk if a child removed them. One tool never carried the whole plan, in my home.
I also saw people ignore power strips because they felt temporary. Power strips sat on floors and behind couches. Children noticed lights and switches quickly. That “temporary” object became a daily hazard, in practice.
Another misconception came from relying on supervision alone. Supervision mattered, yet it slipped during phone calls and cooking. Children moved faster than adult attention. I needed physical barriers that stayed in place, even when I blinked.
The Core Framework / Steps
Step 1
I started with a room-by-room scan. I got down to floor level and looked like a child. Dust bunnies appeared, and so did hazards. Outlets that looked harmless from standing height suddenly felt exposed.
I made a simple map in my head. I marked outlets near beds, play mats, and low shelves. I marked outlet clusters behind televisions. This map guided my spending and my time, and it reduced guesswork.
I chose a “first wave” of fixes for the highest-risk zones. I focused on bedrooms, living rooms, and hallways. Kitchens mattered too, yet children often reached living room outlets first. I worked with how the home actually behaved, not how it should behave.
Step 2
I used basic covers for outlets that stayed unused. I chose covers that snapped firmly and sat flush. Flush covers reduced finger grip and reduced curiosity. This small detail mattered more than the price tag, honestly.
I used box-style covers for outlets that held plugs. These covers enclosed the plug and created a hard shell. They worked well for lamps and white-noise machines. They also reduced tugging, which saved cords from strain.
I cleaned the area and installed it carefully. I tightened screws without over-tightening them. I tested the cover by pulling lightly. If it wobbled, I replaced it, because wobble invited trouble.
Step 3
I reduced cord temptation as a core strategy. I shortened the slack with cable wraps or ties. I routed cords behind furniture and along edges. Less dangling cord meant fewer reasons for a child to crawl toward outlets, in the first place.
I used furniture placement as a silent barrier. I moved a couch so it covered a cluster of outlets. I pushed a low cabinet against a wall outlet that stayed unused. The barrier felt ordinary, which made it easier to maintain.
I upgraded outlets when the home allowed it. I used tamper-resistant outlets in key rooms. Those outlets resisted foreign objects and only opened under even pressure. The upgrade took effort, yet it raised the baseline safety, in a strong way.
Optional: decision tree / checklist
I used a quick checklist before calling a room “done.” I checked unused outlets for tight covers. I checked active outlets for box covers. I checked cords for slack and reach. I checked power strips for exposure. This checklist kept my work consistent, across rooms.
Examples / Use Cases
H2: Examples / Use Cases
Example A
I child-proofed a guest room that rarely got used. The room had two outlets near the floor. I installed firm snap-on covers on both. The fix took minutes and felt immediate.
I also removed a spare phone charger from the wall. The charger looked harmless, yet it created a gripping point. Once it disappeared, the outlet stayed boring. Boring helped a lot, in that quiet way.
I tested the covers each week for a while. One cover loosened slightly. I replaced it and moved on. The room stayed calm and safe for visiting family, after that.
Example B
I tackled a living room filled with daily clutter. A television wall held multiple outlets and adapters. A power strip sat behind the console and glowed faintly. The glow attracted attention, especially in dim light.
I enclosed the power strip in a covered box. I routed the cables through side channels. The box made the whole area less interesting. It also made cleaning easier, which felt like a bonus I did not expect.
I added box-style outlet covers on plugs that stayed in place. Lamps and routers stayed plugged in. The covers reduced cord pulling and reduced exposure. The room felt safer without looking like a laboratory, which mattered to me.
Example C
I worked in a child’s bedroom where outlet access stayed unavoidable. The bed moved, toys shifted, and small hands explored corners. I chose tamper-resistant outlets for that room. I hired a qualified electrician when the job exceeded my comfort level, because safety mattered.
I also used a nightlight that plugged into an enclosed cover system. The light helped bedtime, yet it did not create easy access. I kept the cord path short and tucked. The setup felt practical and gentle, not paranoid.
I ended with furniture placement and routine checks. A bookshelf covered one outlet cluster. A dresser blocked another. The room stayed functional and safer, even during messy play days.
Best Practices
H2: Best Practices
Do’s
I used different protections for different outlet situations. Empty outlets got flush covers. Plugged-in outlets got box covers. Power strips got enclosed boxes. This matching approach reduced weak points.
I kept the cords short and tidy. I wrapped slack and removed unused chargers. I routed cables behind furniture whenever possible. A neat cord path reduced both hazards and daily irritation, which helped my mood too.
I inspected outlets for looseness. I noticed a few outlets wiggling slightly in the wall. Loose outlets created risk and suggested wear. I addressed those quickly with proper help, because ignoring them felt reckless.
Don’ts
I avoided cheap inserts that popped out easily. Easy removal created a choking hazard. Easy removal also created a “game” for a child. I preferred covers that required adult strength or tools for removal.
I did not leave adapters and bulky chargers exposed. Bulky blocks tempted grabbing. They also stressed outlet plates and loosened them. I used shorter adapters or enclosed systems when possible, instead.
I did not place play mats directly under outlet clusters. The mat became a “landing zone” for crawling. Moving the mat a meter away changed behavior fast. Small layout changes carried big effects in real homes.
Pro tips
I used outlet covers that matched wall color. Matching color reduced visual interest. Children noticed contrast and shiny surfaces. A cover that blended in stayed ignored more often, in my experience.
I used switch-controlled outlets carefully. I turned off outlets that stayed unused during playtime. The method did not replace physical barriers. It added one more layer in a layered plan.
I created a “charging station” on a high surface. Phones and tablets charged out of reach. Cords stayed short and anchored. This single habit removed many random chargers from lower outlets, and it helped a lot.
Pitfalls & Troubleshooting
H2: Pitfalls & Troubleshooting
Common mistakes
I saw people cover outlets but ignore cords. A covered outlet still got pulled if the cord dangled. Children liked tugging and watching objects move. The cord became the invitation, not the socket.
I also saw people forget the hallway and the corners. Hallways had nightlights and vacuum chargers. Corners held routers and extension cords. Children explored those “in-between” zones when adults relaxed, often.
I noticed some covers loosened over time. Screws backed out slightly. Plates shifted after furniture bumps. Small loosening turned into easy access. Maintenance mattered, even when it felt annoying.
Fixes / workarounds
I fixed cord temptation by shortening slack and anchoring paths. I used cable clips along baseboards. I routed cords upward behind furniture legs. Less slack meant fewer grabs and fewer surprises.
I fixed hallway hazards by using enclosed nightlight options or moving lights higher. I removed plug-in fresheners near the floor. I kept the vacuum dock in a locked closet when possible. These moves reduced risk in overlooked spaces.
I fixed loose plates by tightening carefully and replacing worn plates. I did not over-tighten, because that cracked plastic. If an outlet felt loose inside the wall, I got professional help. That decision felt boring, yet it kept everyone safe.
Tools / Resources
H2: Tools / Resources
Recommended tools
I used flush outlet covers for unused sockets. I used box covers for active plugs. I used power strip enclosure boxes for multi-plug zones. These three tools covered most home situations, in a practical way.
I used cable management tools like wraps, ties, and clips. I used adhesive clips only on clean surfaces. I checked the adhesion after a day. Good cable control reduced both outlet access and tripping risks.
I used a simple flashlight during inspections. Low light hid hazards behind furniture. A flashlight showed loose plates and exposed adapters. That small tool saved time and prevented missed spots, often.
Templates / downloads
I followed a simple room template each time. I scanned at child height. I covered unused outlets first. I enclosed active outlets next. I then managed cords and power strips. This order stayed fast and repeatable, during busy weeks.
I followed a maintenance template too. I checked covers weekly at first. I checked monthly after habits stabilized. I checked again after moving furniture or adding new devices. Consistent checks kept small issues from growing, quietly.
FAQs
Q1–Q10
Q1 stated that outlet safety worked best as layers. I used covers, boxes, and cord control together. Each layer backed up the others. The approach reduced weak points.
Q2 stated that flush covers suited unused outlets. I used covers that snapped tight. Loose covers got replaced quickly. Tight fit reduced removal attempts.
Q3 stated that the box covers protected plugged-in outlets. I enclosed lamps, routers, and machines. The box reduced cord pulling and exposure. The setup stayed durable in daily life.
Q4 stated that tamper-resistant outlets raised baseline safety. I upgraded key rooms when possible. The outlets resisted foreign objects better. The upgrade required care and proper installation.
Q5 stated that power strips needed special attention. I enclosed strips in protective boxes. I avoided leaving strips on open floors. Children noticed switches and lights fast.
Q6 stated that cord management reduced outlet attraction. I shortened slack and routed cords behind furniture. I anchored cables along edges. Less cord meant less crawling toward outlets.
Q7 stated that furniture placement acted as a barrier. I placed heavy furniture in front of outlet clusters. I avoided blocking ventilation for electronics. The barrier stayed simple and stable.
Q8 stated that loose outlets increased risk. I checked plates for wobble. I addressed looseness promptly. Proper repairs prevented deeper problems.
Q9 stated that overlooked areas caused surprises. I checked hallways, corners, and guest rooms. I removed low chargers and exposed adapters. A full-home scan reduced blind spots.
Q10 stated that routine checks kept protections effective. I tested covers for tightness. I checked after cleaning and furniture moves. Maintenance kept the plan reliable, over time.
Conclusion
Summary
I child-proofed outlets by combining barriers, enclosure, and cord control. I worked room by room and fixed the worst spots first. I used tamper-resistant upgrades where possible. The home felt calmer and safer after those changes.
Final recommendation / next step
I recommended starting with the rooms where children played most. I recommended using flush covers for unused outlets and box covers for active plugs. I recommended enclosing power strips and managing cords. These steps created fast improvement without chaos, in most homes.
Call to Action
I encouraged you to scan one room today at child height. I suggested fixing the easiest outlets first to build momentum. I suggested repeating the process room by room. Small safety work added up and created real peace, which felt priceless.
References / Sources
This blog followed the provided structure template. I included no citations and no links by request. I focused on practical outlet safety habits in a home setting. The writing stayed structured and narrative-led throughout.
Author Bio
Sam wrote practical home and family guides with a calm voice. He liked simple systems that reduced stress in real houses. He valued clear steps, careful checks, and routines that lasted.